How to Make a Mowing Strip

Leave a 6- to 12-inch-wide mowing strip between the edge of your beds and borders and the lawn. It will help you save time and effort in the garden.
Step 1: Dig a Trench
Mark the area for your mowing strip lawn edging by using flour or powdered chalk. We recommend that it is between 6 and 12 inches wide. Then use a spade to cut through any sod and remove it, excavating a 6- to 8-inch-deep trench.
Gather Materials
A paved strip between grass and beds or borders means you can mow your lawn without worry of damaging plants or trimming afterward. The ground-level strip enables the blade to cut freely. And making it 12 inches wide provides a stable path to walk on or a dry perch for while working in the bed.
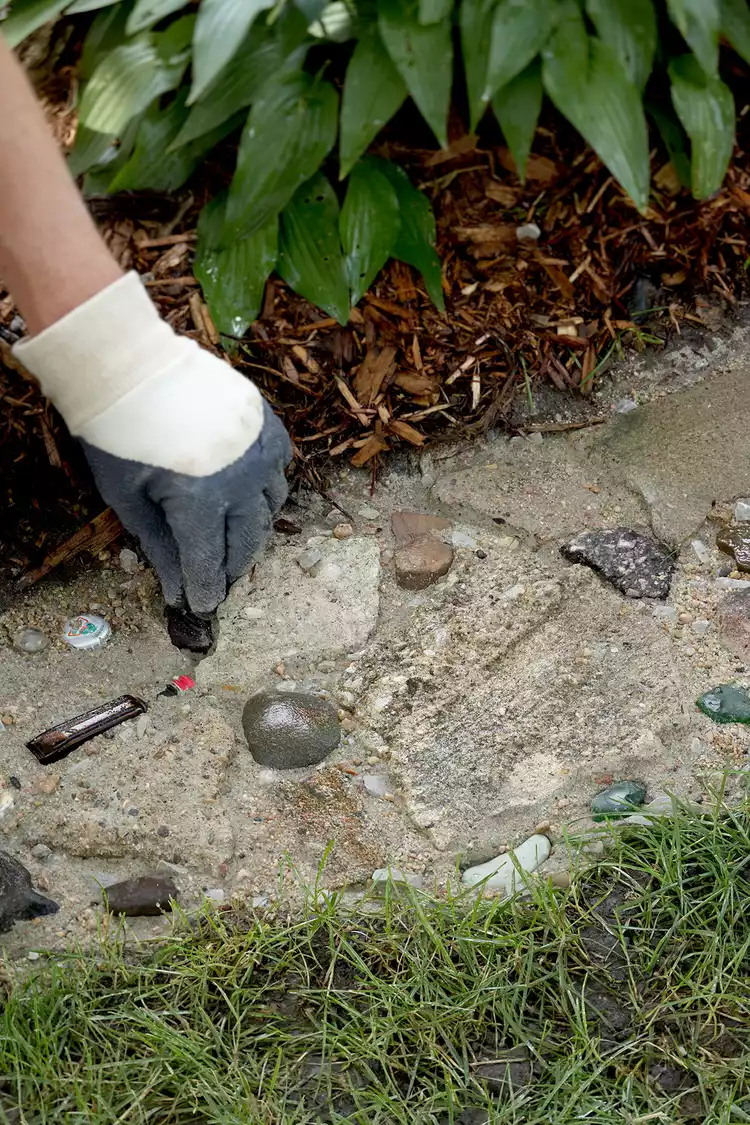
Rubble, a mix of irregular fieldstones, and broken concrete chunks provide ideal materials for creating a mowing strip. There's likely a shattered sidewalk or driveway ready for recycling and perhaps free for hauling. Road-base gravel is a rough-edge, unrinsed material that also works well as a base for the mow strip. The quantity of materials necessary for the project depends on the length of your bed and the width of the strip.
Here's a list of what you'll need:
- Waterproof work gloves
- Flour or powdered chalk
- Coarse sand
- Road-base gravel
- Rubble (with at least one flat side) or fieldstones
- Quick-setting concrete mix
- Hand brush or broom
- Garden hose with spray attachment
- Decorative items, such as colored sea glass, sparkly rocks, or other treasures
- Sheet plastic or burlap
Step 2: Start Filling Trench
Cover the bottom of the trench with a 1- to 2-inch-deep layer of sand. Top the sand layer with a 1- to 2-inch-deep layer of road-base gravel. Don't worry about leveling the layers yet.
Step 3: Add Larger Stones
Position the rubble or fieldstones at ground level with flat sides up. Add gravel under pieces as needed to create a level surface. Leave 1-inch-wide or larger gaps between the pieces. Sprinkle gravel into the gaps until they're mostly filled and the area is level.
Step 4: Add Concrete Mix
Use a flexible scoop, such as a plastic yogurt cup, to sprinkle concrete mix into the gaps. Brush any excess off the adjacent rubble.
Step 5: Wet Concrete
Attach a spray nozzle to the garden hose and gently sprinkle the installation with water just until the concrete mix is saturated. Add dry concrete mix to level any areas and saturate.
Step 6: Add Finishing Touches
Concrete sets within 15 minutes, so work quickly to add finishing touches, tucking decorative items into the wet concrete. Cover the finished installation with a sheet of plastic or burlap to keep the concrete damp while it cures. Wait two days before walking on it.